Home > PowerPoint Tutorials > Special Effects > Contour Shadow in PowerPoint
In this article, you will learn a simple way to apply contour shadow in PowerPoint. This ensures that the shadow is applied to the contours of images instead of to the entire photos. It just takes a few steps to achieve this remarkable effect.
The usual issue with applying shadows to images:
Take a look at what happens when we apply a perspective shadow effect to the picture of a man running:
 As you can see the shadow is applied to the rectangular shape of the picture instead of the shape of the man running.
What if we want to apply the shadow effect to the silhouette instead of applying to the entire photo? Is it possible?
Yes. Here are the steps to achieve it:
Step 1: Crop the photo closer to the contour
The first step is to isolate the area you want to crop. So, use the ‘Crop’ tool closer to the contour you want to apply the shadow effect to:
 Crop image to contour
Step 2: Apply Set transparent color to the background
Open the ‘Color’ drop down menu in the Format tab. At the bottom of the menu, you will find an option called ‘Set transparent color’.
 Set Background to Transparent
Click on the option to get a cursor that resembles a wand. Click on the white area of your photo to remove the background.

Step 3: Apply perspective shadow preset
The last step is to apply ‘Perspective’ shadow preset as shown below:
 Add Perpective Shadow
Here is a ‘Before – After’ scenario:
 Before and After Shadows
A query from a reader:
One of our readers had this query. She wanted to add a contour shadow to a vase of flowers with a complex background ( not a single color as in the example above). Using the Set Transparency option to remove background would not work in such a case.
Here is the solution if the background of the image is complex….
We have taken a random image of a vase of flowers with background:
 We used the Remove Background option ( in PowerPoint 2010 / 2013) and adjusted the areas in the background to Keep and Remove.
 We added a perspective shadow to the resulting image and the final image looks like this. The solution works like magic!
 Wasn’t that simple? If you want to know when to use set transparency option and when to use the remove background option, you can refer to the video here.
Examples of using shadows in presentations:
Here are some examples of how we have used shadows for images and shapes to create realistic effects in presentations.
Shadow effect to a group with shape and image:

Source: Picture showcase section of PowerPoint CEO Pack 2
Perspective shadow to shape to create window effect
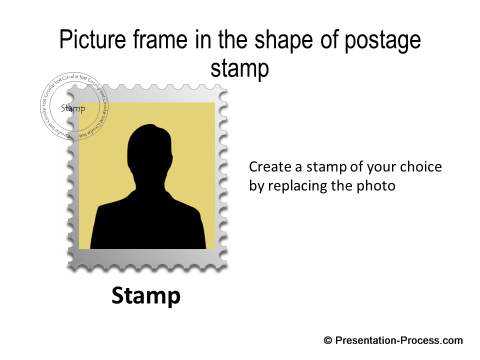
 Creative postage stamp effect with shadow:
 As you can see, using proper shadow effects on your pictures is one way to make impressive slides.
Quick Note:
All of the example diagram templates showcased above are from the picture showcase section of PowerPoint Charts and Graphics CEO Pack 2.
The pack contains 815+high quality graphics and diagrams created by us from scratch.
All the templates in the collection are 100% editable. Just choose the template that matches your thought and replace the sample text with your own text. Your business slides get ready in no time. Creating professional quality business slides has never been easier. Go ahead browse and download the templates to create high-quality presentations quickly.
 If you liked this article, please leave us a comment below. You can find 200+ Advanced PowerPoint tutorials, free in this site.
Related: 3 Common mistakes in adding shadows
Return to Main Special Effects in PowerPoint Page
